
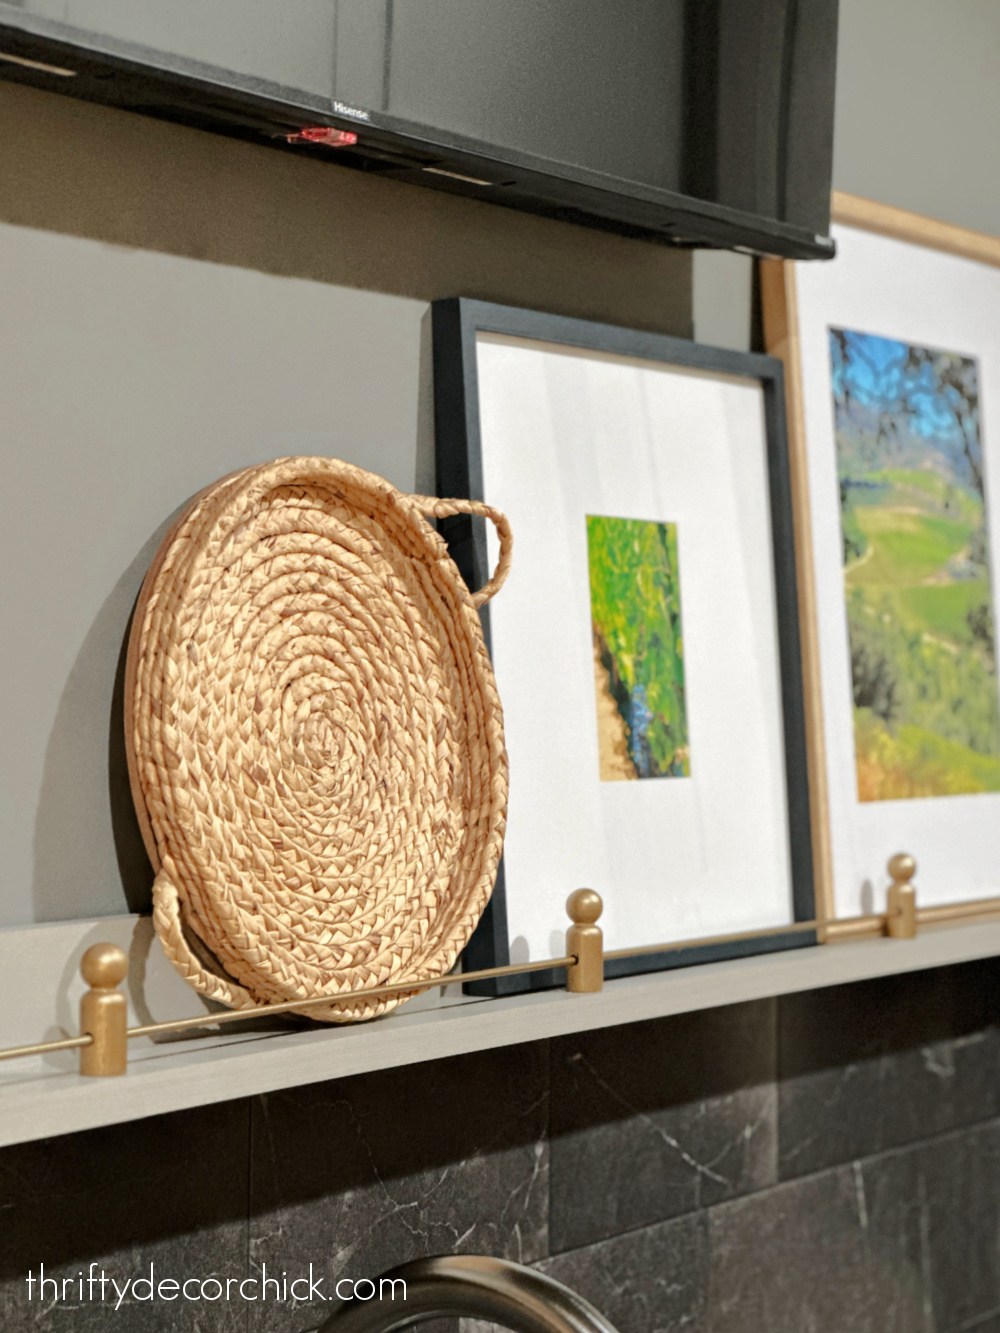
DIY “brass” gallery/tipping rail for a shelf (for method much less!).
often put in alongside the entrance of shallow cabinets as a fairly ornamental
accent, they usually forestall gadgets from sliding off the shelf.
I really like something brass, particularly an attractive little element like
these posts and rails. I knew I needed to include them into our basement
kitchenette, however the true brass choices usually are not low cost!
I ended up creating my very own model that I feel seems to be fairly nice, and
features simply as nicely!

This submit might include affiliate hyperlinks for
your comfort.
I’ll earn a small fee when you make a purchase order by hyperlinks.

Since these have been so cheap (I spent lower than $80 on the tile), I
splurged on the
sticky tile setting mats
I really like a lot for the set up:

They make the tile set up a lot simpler and faster, with a lot much less mess!
They do price greater than mortar although, so that you pay for the comfort.
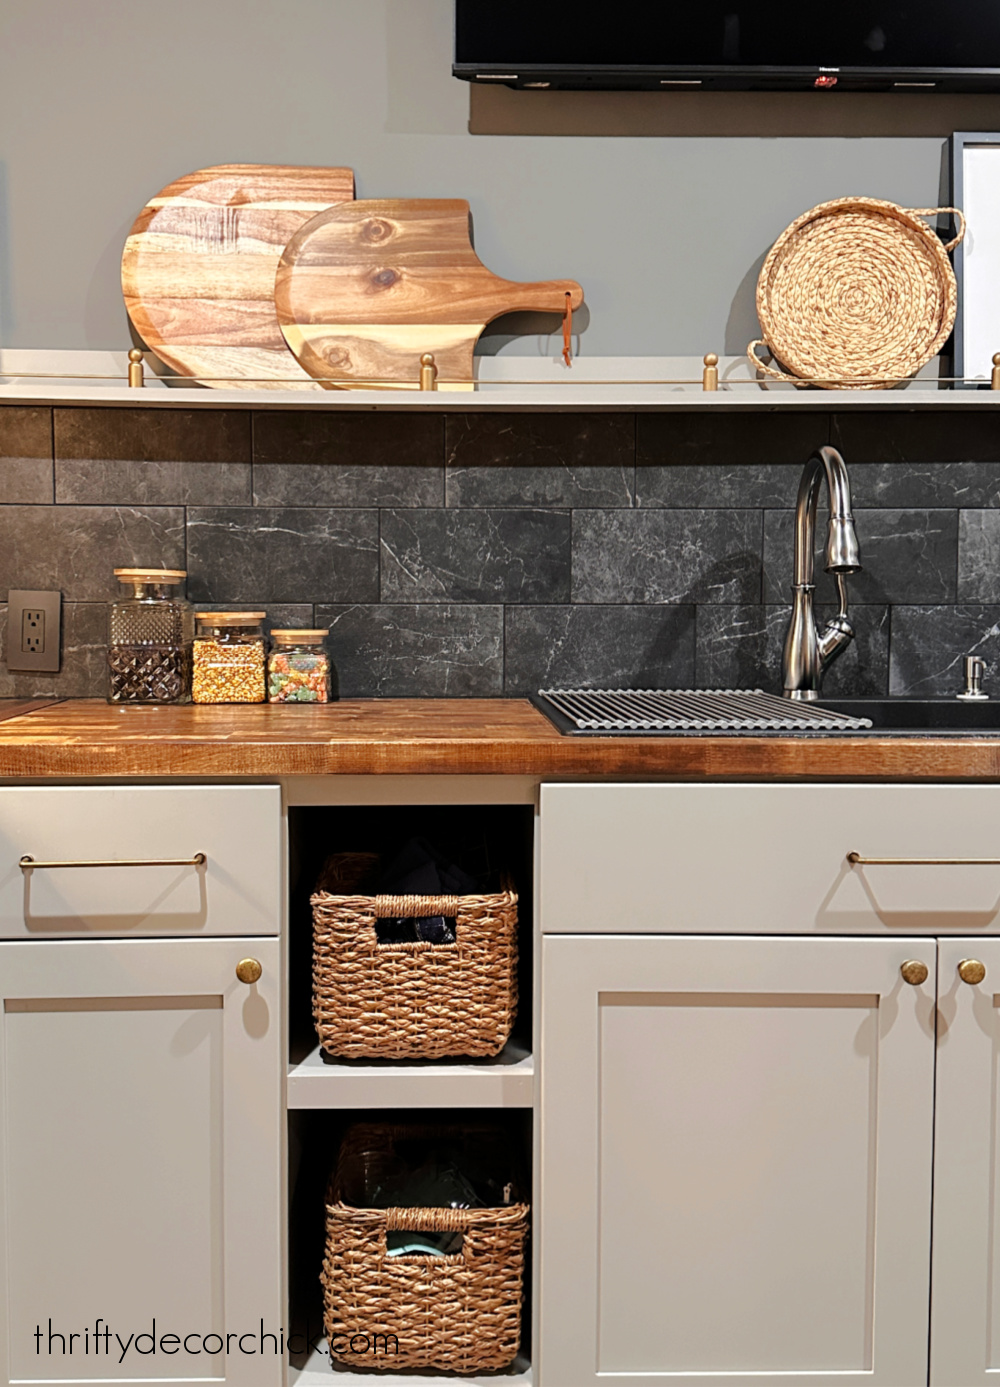
After the tile was up, grouted and caulked alongside the counter tops, I
put in an extended however shallow shelf proper on high of the tile backsplash:

I used poplar wooden for this challenge realizing my plan to drill into it. I
often use pine, however pine is softer and extra liable to splitting.

They solely take three items of wooden, however for my newest model I solely used
two — the again piece (that I connected to the wall) and the underside
piece.
I priced out the brass posts and rails for my lengthy shelf (it is practically 9
toes lengthy) and the whole was going to be $200! I am all for splurging, however I
stored hesitating to get them organized…figuring I may make one thing comparable for
method cheaper.
this post by my friend Carli, and the wheels began turning. I went to the craft retailer to see what
wooden items I may discover to make this work.
these wood peg men
(they appear to be the previous Little Folks toys) which are about 2.5 inches tall
at Interest Foyer, then grabbed three of
these metal rods
at Lowe’s.
To make this DIY model work, I wanted to have the ability to drill a gap straight
by the wooden pegs. I attempted it out simply holding one and drilling into it,
however I could not get the outlet fairly straight sufficient.
So as an alternative, I made slightly holder/jig for my little males. 🙂 I nailed a number of
scrap items of wooden tightly round one so it match cosy in there:

I wrapped them with painter’s tape to keep away from the wooden splitting on the
entry and exit of the drill bit.
The peak of the outlet must be constant on all the pegs, so the
rail is degree throughout the completed shelf. I marked the identical spot on each
and used a 1/4 inch drill bit to create the holes:

As soon as the little males have been all completed, I made positive the holes have been a
constant top:

The one on the left was my take a look at piece, and I did not find yourself utilizing that
one.
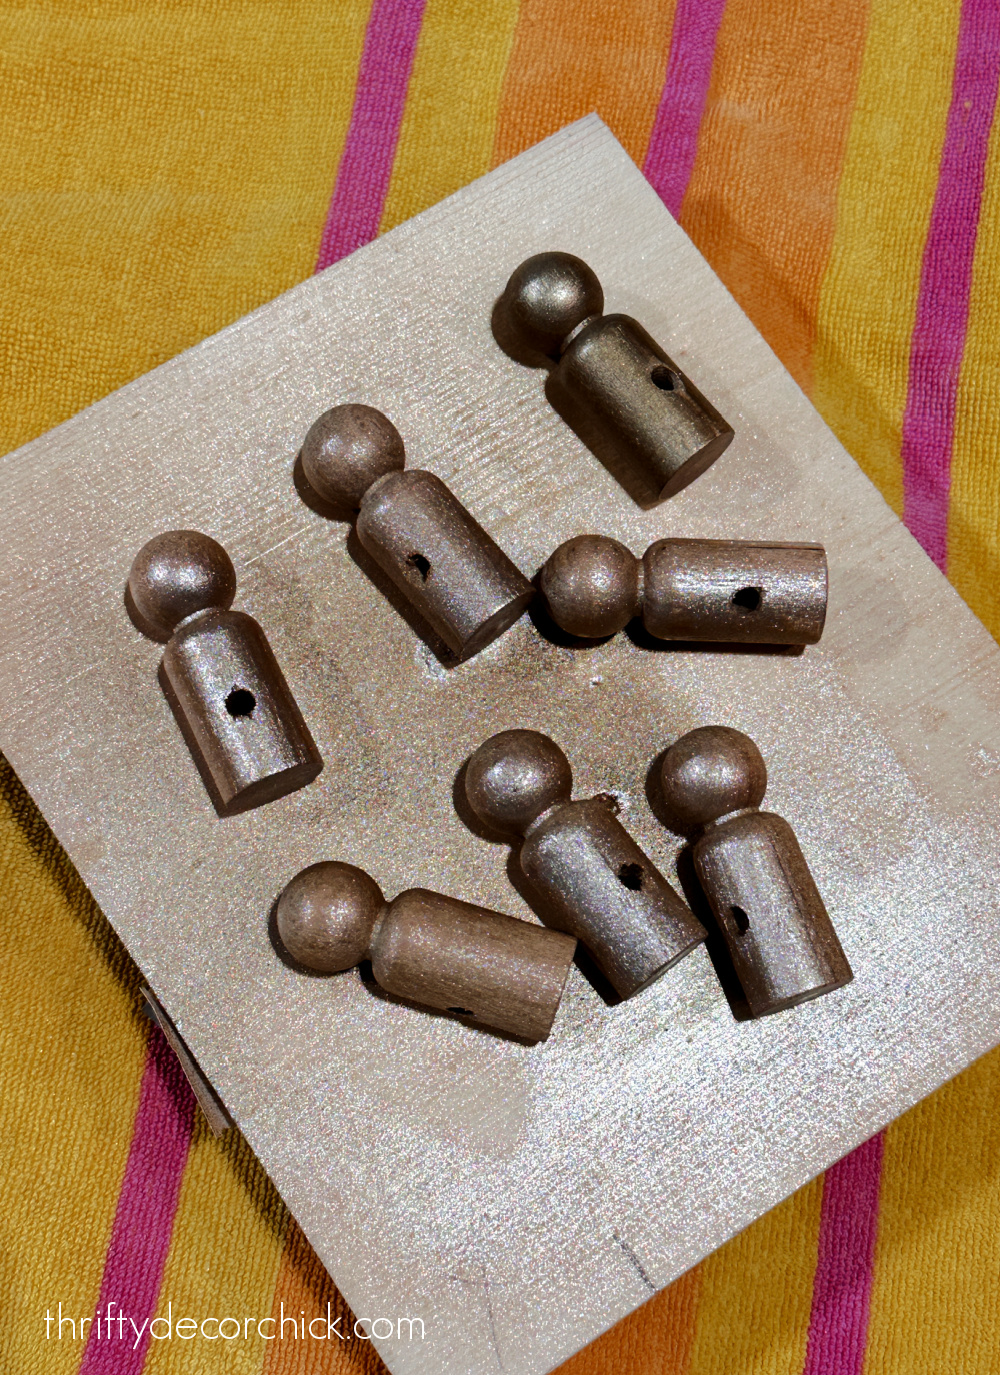
As a result of these are wooden, I did a lightweight sanding of the pegs earlier than the ultimate
coat so the wooden grain could be much less pronounced. It positively helped to
make them look extra like strong steel.
After cleansing the steel rods, I sprayed these as nicely:

I feel spraying these took longer than putting in the entire dang factor.
Spray slightly, dry, flip. Spray slightly, dry, flip. 😂 I like to recommend simply
holding them and spraying half at a time.
When every thing was dry, I took every thing right down to the basement to determine
out my spacing. I had seven pegs, and two of these have been positioned on the ends.
So I had 5 to house out equally in between.
I used a small drill bit to make a gap within the backside of every peg:

Take some care to not break up the wooden as you go. The important thing to doing that’s
going slooooow as you drill and beginning with smaller bits and dealing as much as
bigger ones if wanted.
I used that very same small bit to place my preliminary holes into the ledge, after which
adopted up with a barely bigger one:

For this challenge, I’d err on making the outlet lots large in your screw
so it does not crack your wooden as you put in the pegs.
I put in the screws from beneath the ledge, into the underside of every
peg.
Once more, be affected person and go sluggish as you connect the poles. I did not have any
points in any respect with the shelf or pegs splitting as a result of I took my time and
drilled holes first.
I held up every steel rod to see the place I wanted to trim them down, after which
used the steel blade on my oscillating device to chop them. It solely took a number of
seconds to get about midway by the rod, then I snapped the surplus
off.
this inexpensive hacksaw
is a worthwhile device to have available.
As soon as they’re all put in, the rails aren’t going wherever! It’s
extremely safe and can maintain up nicely to the frames and boards I’ve on
this skinny shelf:
You possibly can additionally use wooden dowel rods for the rails, however they will not be fairly as
sturdy, particularly in case you have greater than a meals or so between the
posts.
We LOVE it! We had buddies over this week and I received so many compliments on
my cute DIY tipping rail. 🙂
It took slightly work, however I saved greater than $180 doing this by myself. The
three rods have been $12 and the wooden pegs have been $4:
When you stand up realllll shut, you may inform the “brass” posts are wooden, however
it might take some inspection. Until you are an skilled on brass gallery
rails, I do not suppose anybody would suppose a factor about them being wooden
anyway. 😉

Just some extra tasks to complete up and share in right here, after which I am going to do
the total tour of this house:

It was SO definitely worth the time creating my very own model of this gallery rail
challenge! Now I am considering of the place else I can add these round the home. I
simply love the little ornamental element.
