
Easy methods to make a customizable pet meals tray that can maintain as much as water and messes!
I made an lovely, washable feeding station utilizing scrap wooden and paint we had available and we LOVE it! It turned out so cute.
That is the second time I’ve made a customized DIY pet meals tray. I will present you my first model on the finish of this submit!
We saved them in our pantry earlier than I did the large makeover final 12 months. When that was completed, we tried retaining them within the mud room for awhile, however it felt like we had been all the time bugging the animals after they had been consuming because it was close to a walkway.
Sooo we determined to maneuver them again into the pantry on the finish of the room, however I needed to construct a brand new pet meals tray to coral their messes a bit.
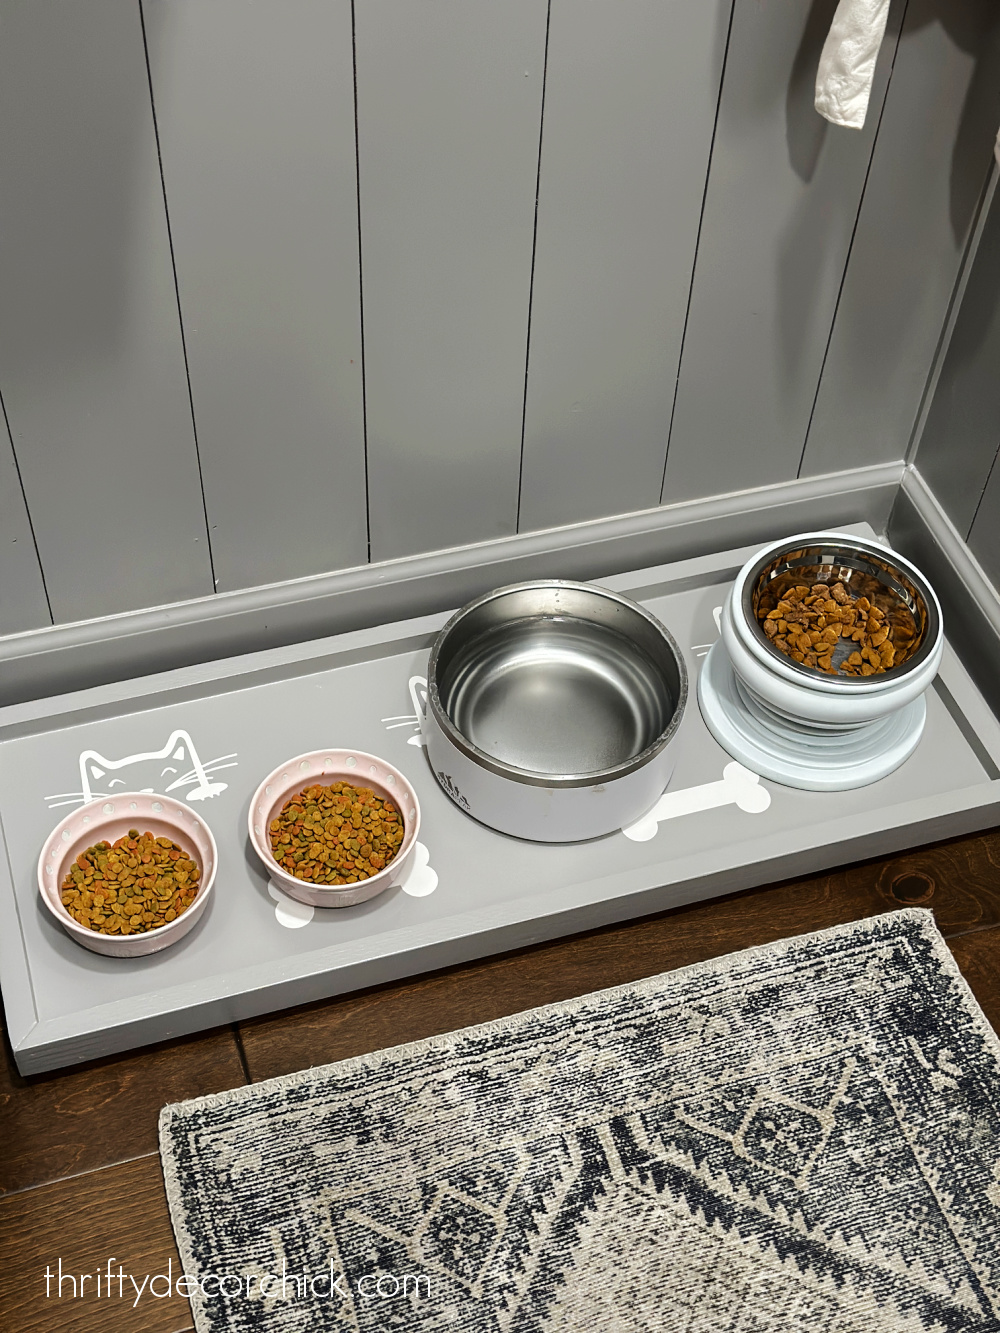
Our canine appears to get extra water out of the bowl than really drink it, and our cats drop their meals throughout their bowls. We would have liked one thing that may very well be washed and maintain as much as standing water over time.
Fortunately I had many of the supplies wanted for this cute tray already, so this was an excellent cheap challenge!
I began with a chunk of scrap wooden for the underside of the tray, after which mitered the ends of a 1×2 to make a “body” across the backside:
This submit could include affiliate hyperlinks on your comfort.
I could earn a small fee when you make a purchase order via hyperlinks.
This tray is a good newbie challenge in the event you’re simply beginning out with instruments and DIYing!
I measured the meals bowls to see what measurement I wanted and I ended up with 30 inches for the bottom of the tray. I minimize down my 1x2s for the lip on my miter noticed.
To connect the trim, I added a bead of wooden glue earlier than nailing them into the perimeters of the bottom with my nail gun:

If you do not have a nail gun, wooden glue could be enough — you will simply have to let it dry earlier than transferring on.
After which as a result of I needed this to be water tight I caulked the gaps between the bottom and the trim. That is tremendous vital to maintain any water from stepping into the crevices!
I had this wooden primer from Sherwin-Williams available and it was good for this challenge because it’s made to guard exterior surfaces that get rain:

Any primer will work, however this model simply offers a bit extra safety.
Wooden surfaces can maintain as much as numerous moisture with caulk and paint!
Just a few coats of excellent paint will stop even MDF from absorbing water.
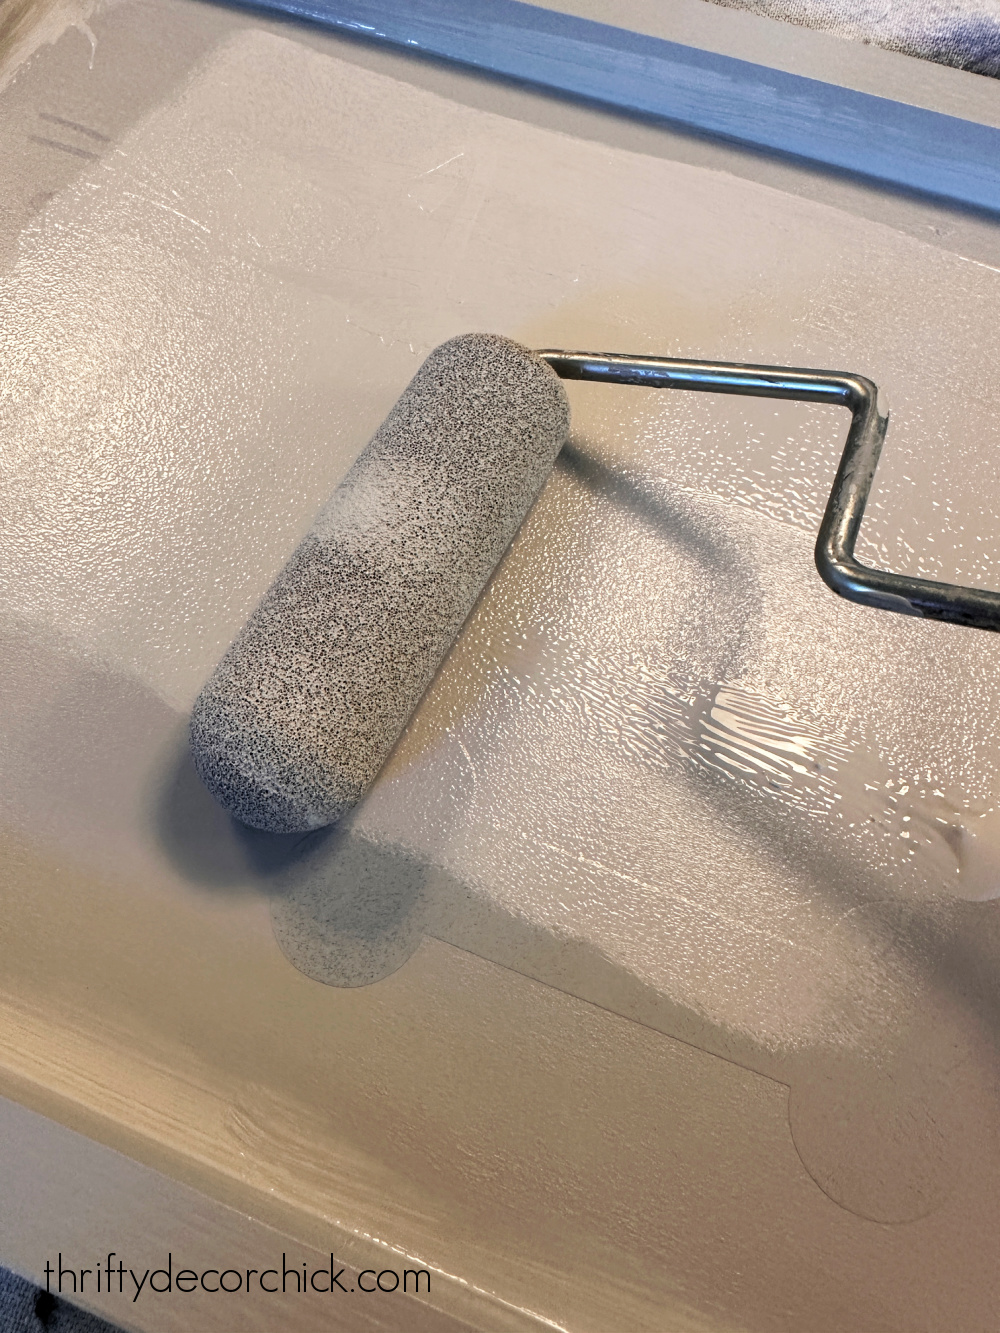
After two coats of primer, I put a fast coat of white paint on simply the bottom of the tray after which let that dry for day earlier than transferring on to the lovely a part of this DIY. 🙂
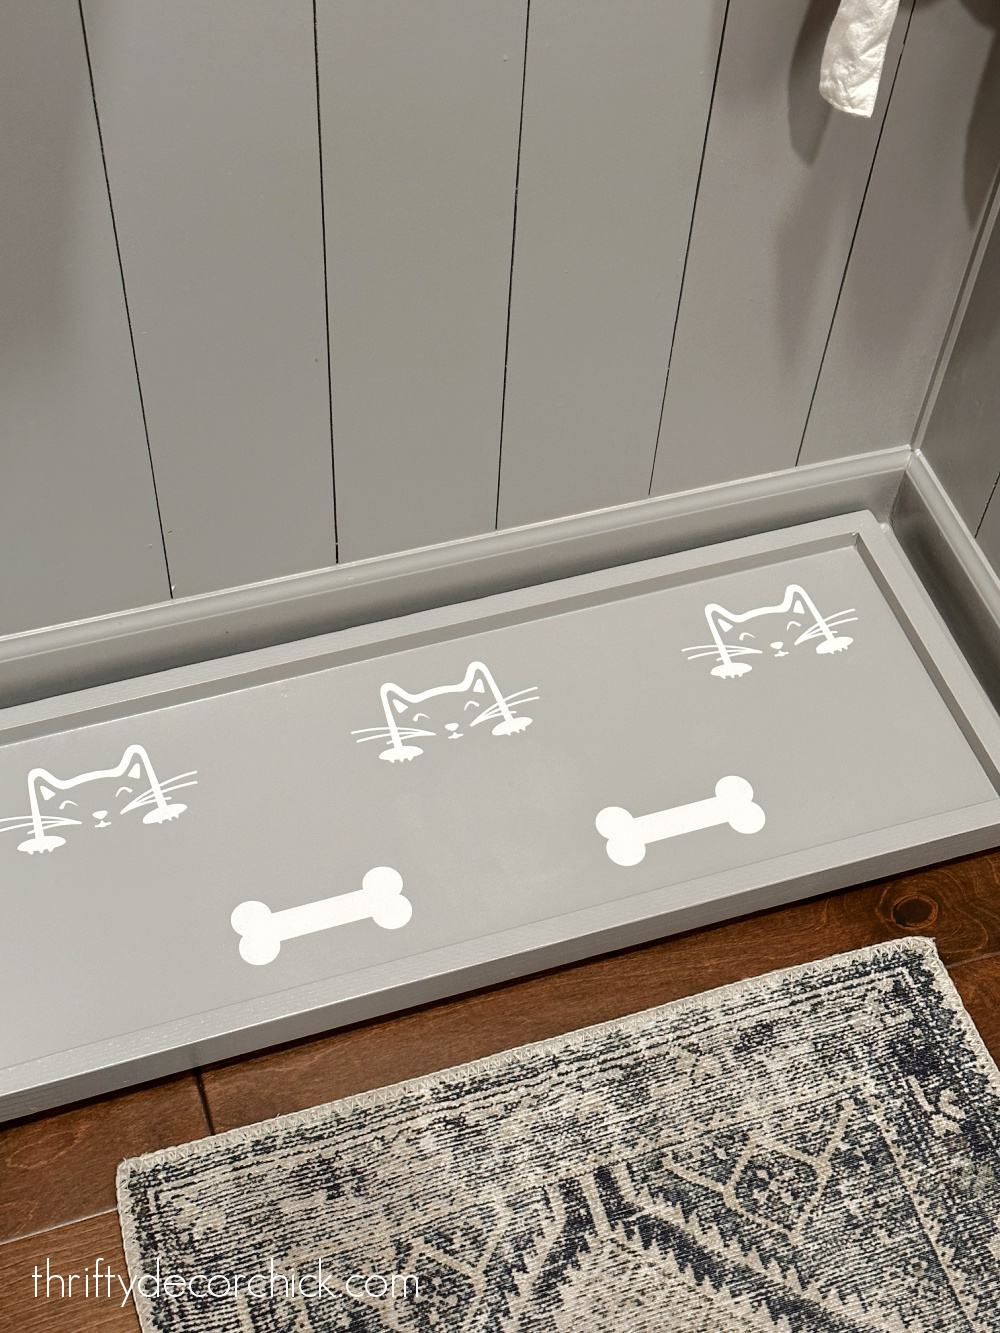
I acquired some pet wall vinyls final 12 months for one more challenge, and thought this tray could be one other cute method to make use of them! I put a couple of on the underside over the white paint:

Protecting the vinyls on, I painted a pair coats a light-weight grey over your entire factor:
I coloration matched our pantry cupboards to get this coloration, this is the system you’ll be able to take to the paint retailer:

It is such a beautiful grey coloration — no bizarre undertones in any respect!
Subsequent, I needed so as to add some toes to get the tray up off the ground. I needed it to be open a bit beneath in case water spilled out.
I discovered these cute little wooden toy wheels on the craft retailer and painted 4 in that very same grey paint:

I screwed these into every nook beneath the tray.
After the paint was absolutely dry, I used some tweezers to drag up the canine and cat vinyl designs:

I let every part dry for a full day earlier than placing the meals bowls on the tray. It turned out SO cute!!:
Adoyable as my neice would say! 🙂
I saved strolling round with it, exhibiting my household how stinking cute it was. 😂
I made it to suit on the finish of our pantry:

We do not stroll down that far since that finish cupboard opens out in direction of us, so it is a lot out of the way in which.
I like having their meals again in right here so that they have a bit extra of a relaxed house to eat. It is also nice as a result of their meals is in that cupboard and simply accessible.
The animals appear to love it. Ha! SO cute:
It is out of the way in which and offers them loads of room.
We hardly ever shut the pantry door, however we maintain further meals and water out in our basement kitchenette in case they want it.
I put this easy challenge off without end, and at last acquired it achieved for round $10 in supplies!:

Years in the past I made a really comparable tray at our previous home. I used some painter’s tape to create a easy striped design on that one:

I believe the dimensions was the very same! I do not know what occurred to this one — I can not bear in mind what we did with it. We had SO many issues go lacking in our transfer, perhaps it was a kind of.
It turned out actually cute as effectively — you’ll be able to customise these so some ways whenever you make your personal pet meals tray:

I’ve made fairly a couple of ornamental trays in my day, together with this tray with leather handles, and this Lego hideaway tray.
You’ll be able to change these up so some ways — add some handles, use a stencil on the bottom, no matter you need – the probabilities are limitless! 🙂
