
How you can set up STURDY cafe patio string lights with out timber!
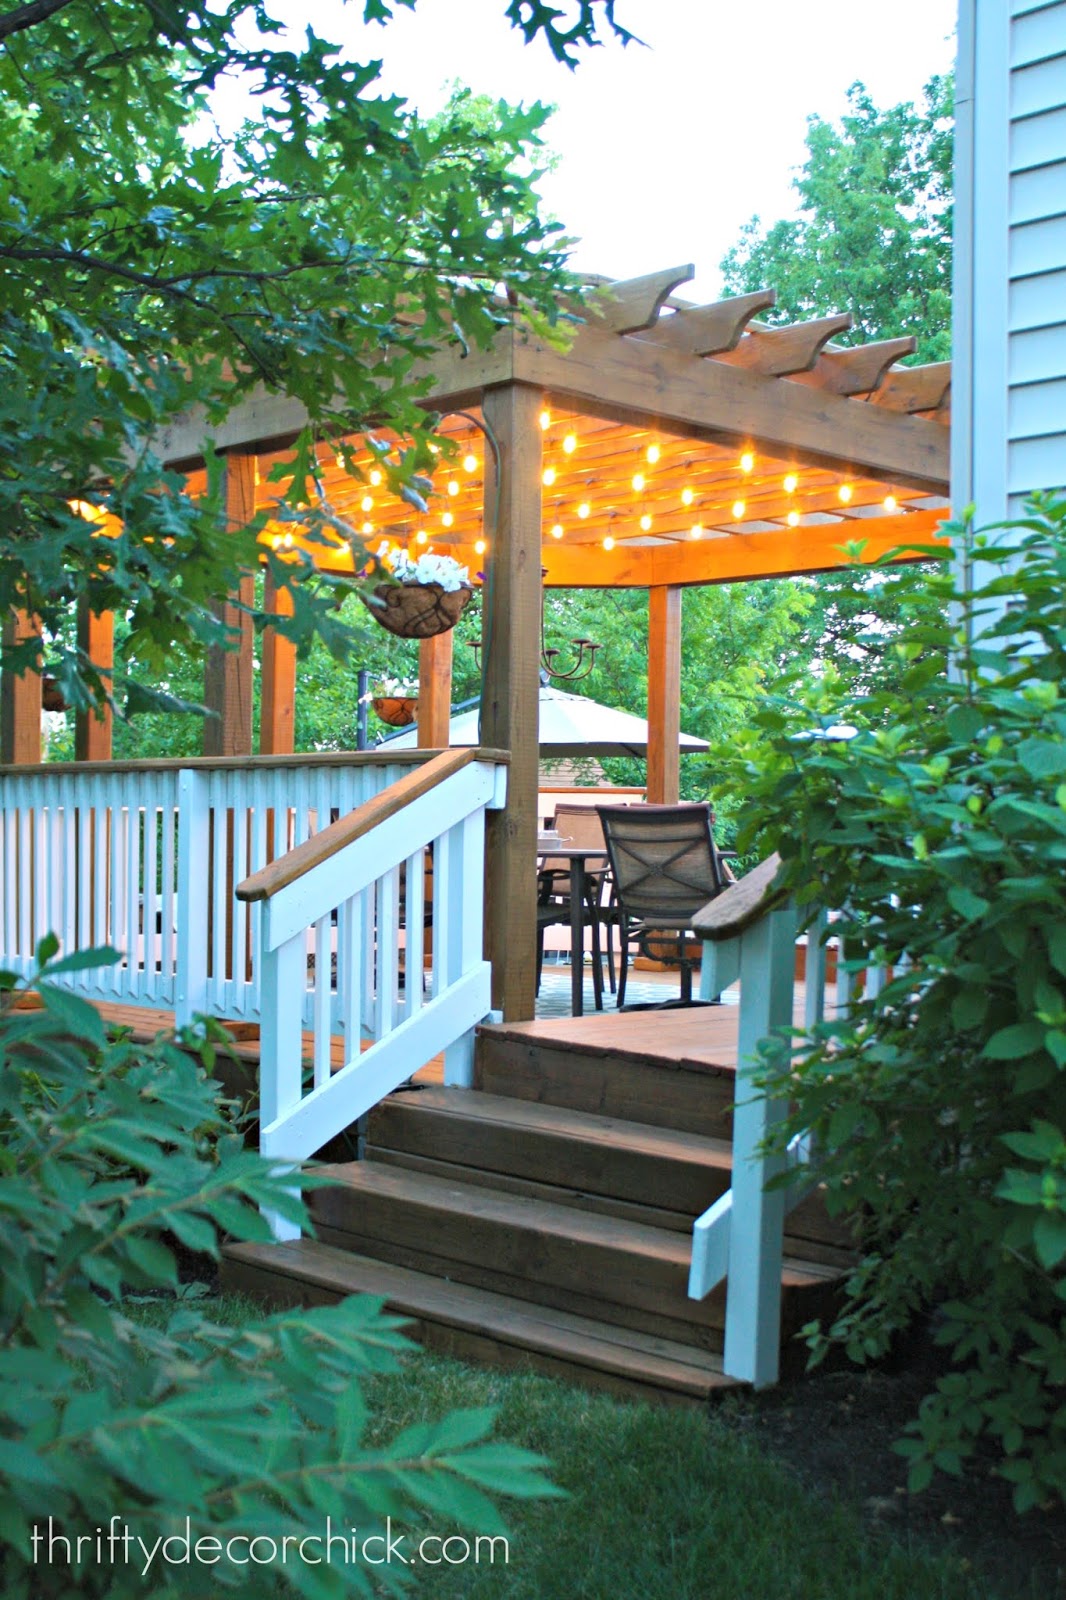
Putting in these outside string lights was on my checklist for years after we moved into our home! The issue was, we had a brand new yard with no mature timber to connect the lights to.
I had to determine a method to hold these patio lights in a secure manner so they’d maintain as much as rain, wind and snow.
This publish could comprise affiliate hyperlinks on your comfort.
I could earn a small fee when you make a purchase order via hyperlinks.
It helped that we had timber sufficiently big to carry the load of those — they’re heavier than your common outside lights, however once more…they final without end.
As a result of we do not have timber across the patio but (and it might be years earlier than they’d be sturdy sufficient to carry the sunshine strands), we had to determine a special possibility.
I have been researching this for a yr as a result of it was so vital for this to a.) be purposeful, b.) look good and c.) not break the bank. I gathered data from a bunch of tutorials I discovered after which we needed to make some extra modifications on the finish I will share with you. (Trace: the tutorials we discovered did not work for the heavier lights!)
Let’s get began! I will checklist ALL of the gadgets you may want on the finish of the publish, however listed below are the step-by-step directions.
Step 1: Collect the planters you want to make use of.
Among the tutorials I discovered used wooden wine barrel planters — however the ones I discovered both had massive holes already drilled into the underside or they weren’t tremendous sturdy. I used to be apprehensive the concrete would ooze out between the slats of wooden.

They nonetheless have that wine barrel look however ought to maintain up a lot better!
I initially had three planters, however we ended up utilizing two after we discovered what number of toes of lights we had.
Step 2: Safe the poles within the planters.
Subsequent, we grabbed eight foot 4×4’s for every planter. The fast set cement set actually quick — however this subsequent step was useful. I put in “L” brackets onto the underside of every 4×4 after which screwed them into the underside of the planters earlier than including the cement:
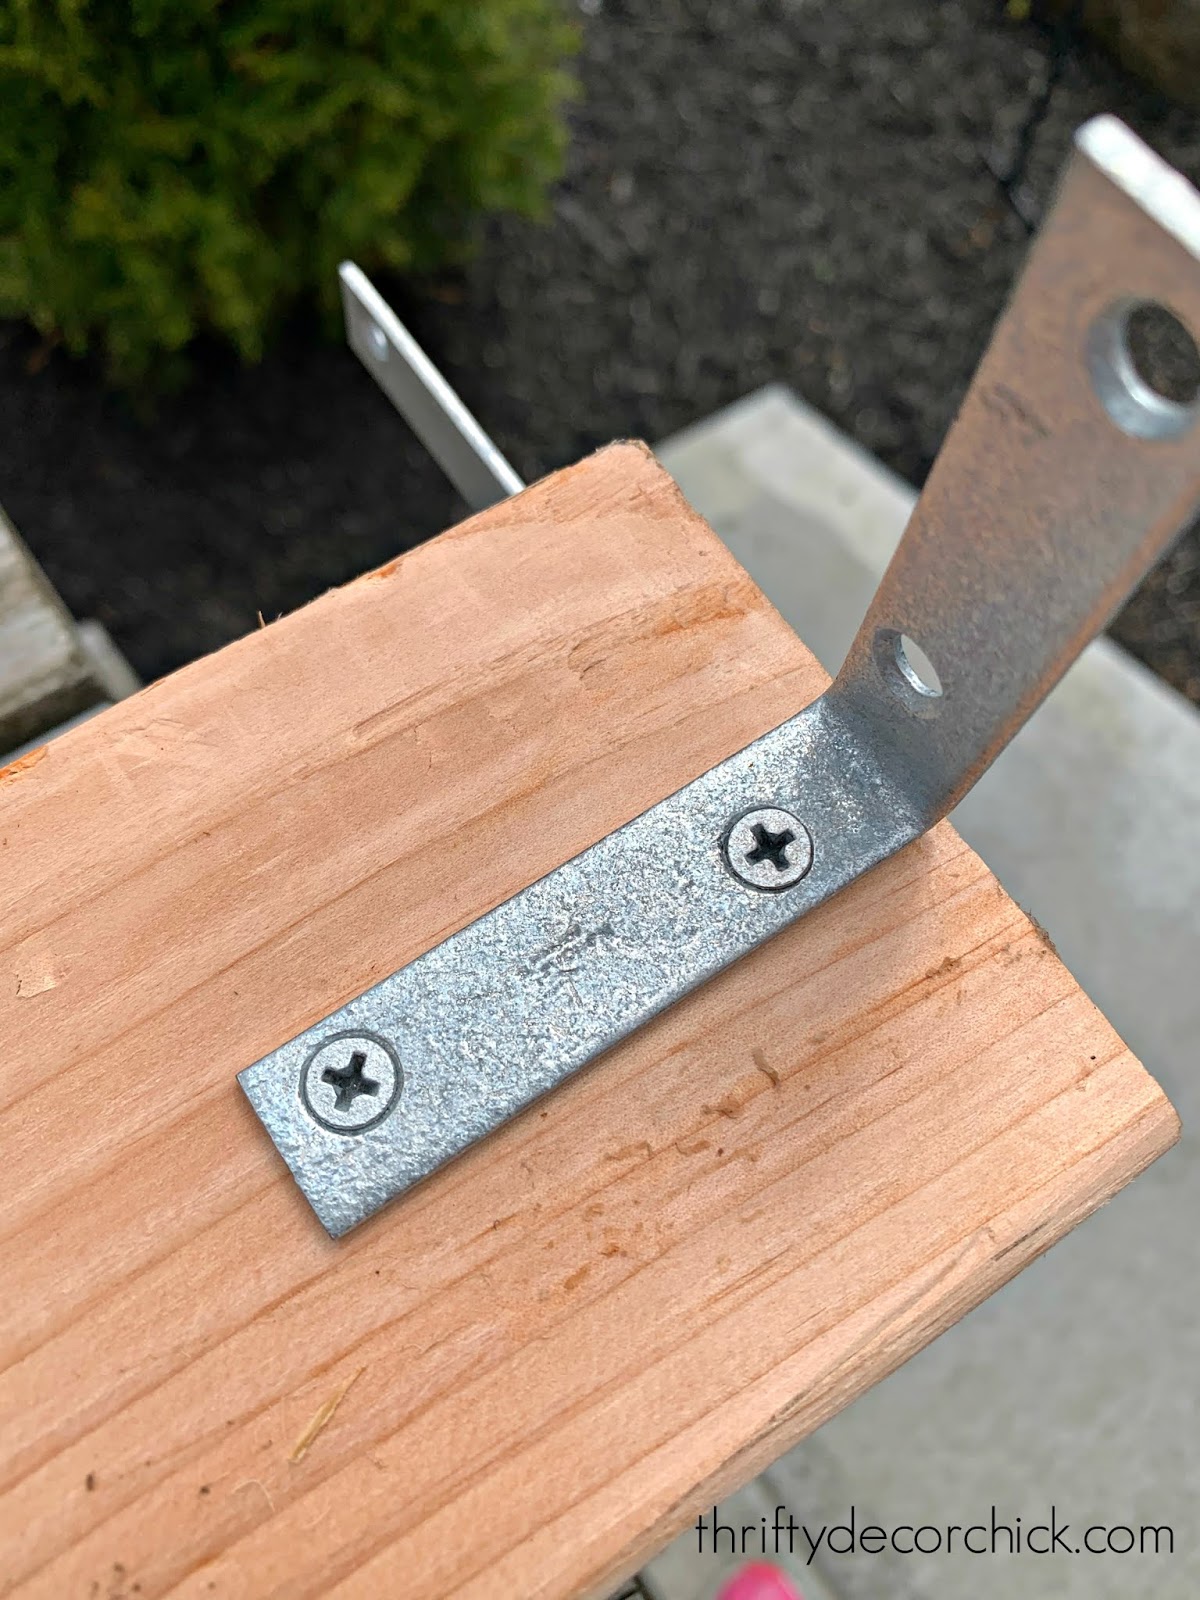
This is not going to maintain them tremendous safe (a minimum of with plastic planters), so you possibly can’t let go simply but — however they do assist!
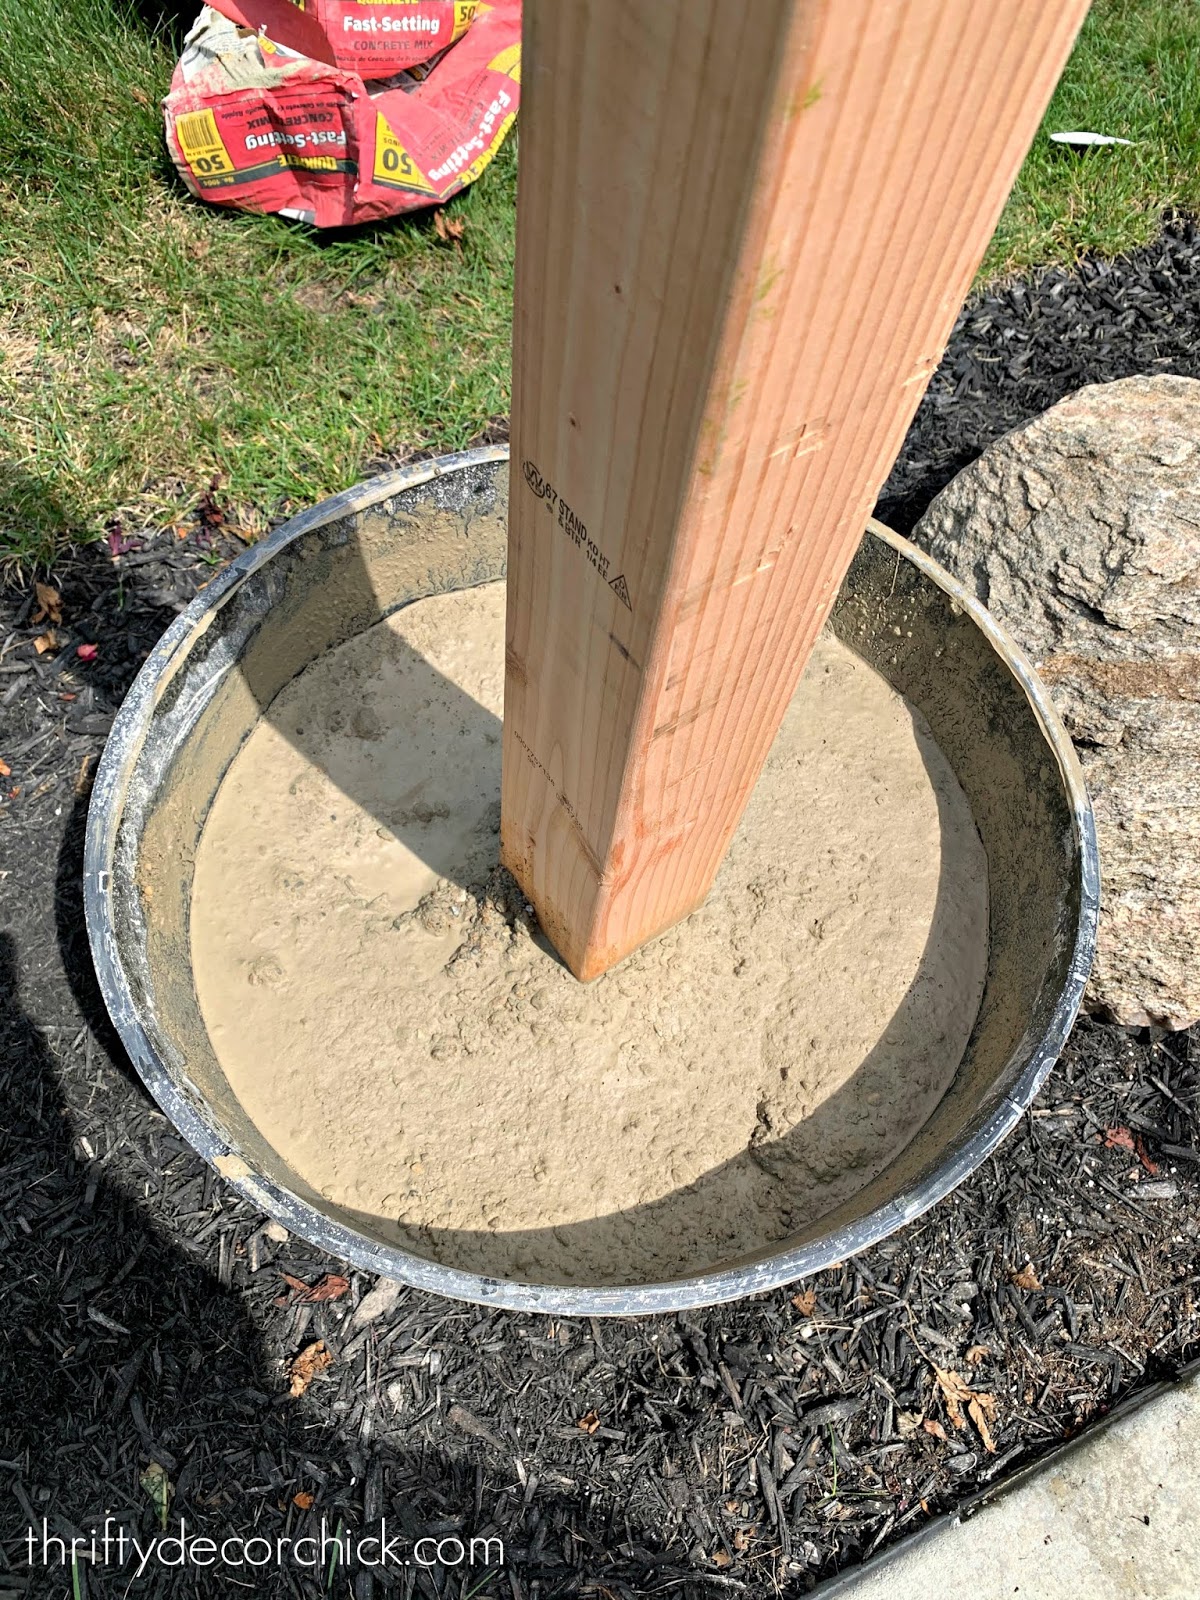
I’ve by no means use cement however it was surprisingly straightforward! We used two 50 pound luggage of Quikrete for every planter:

We added and blended one bag at a time — you add the cement after which spray water. You do not want a ton of water — simply combine in addition to attainable so there is no dry cement left:
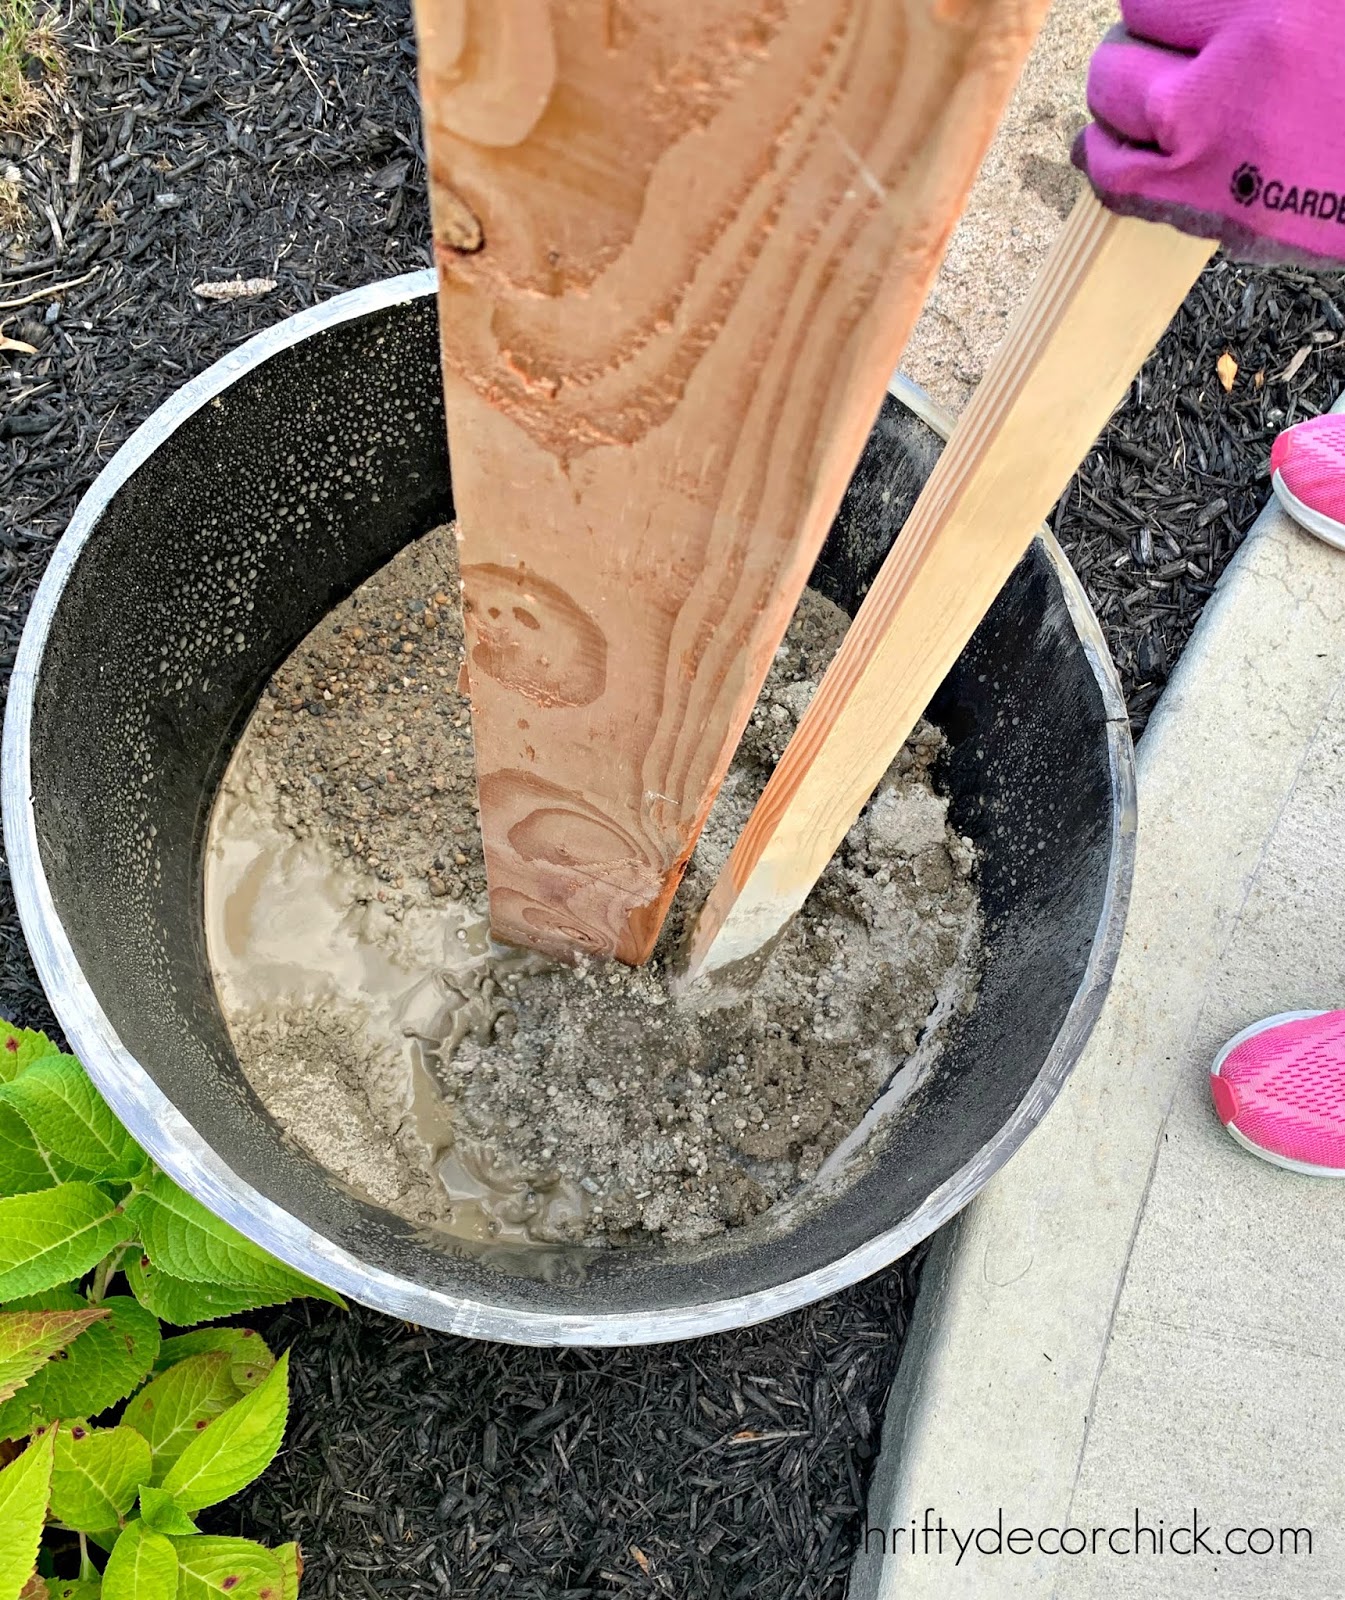
For the primary planter it took three of us as a result of I used to be apprehensive the 4×4 would not maintain at first. However the cement units up so quick, it simply took two of us for the second.
Use a degree to test the 4×4 throughout this course of. It does not need to be completely straight — bear in mind you possibly can alter the mulch or filth underneath the planters to assist make the poles straight.
Inside 15-20 minutes it wasn’t budging:
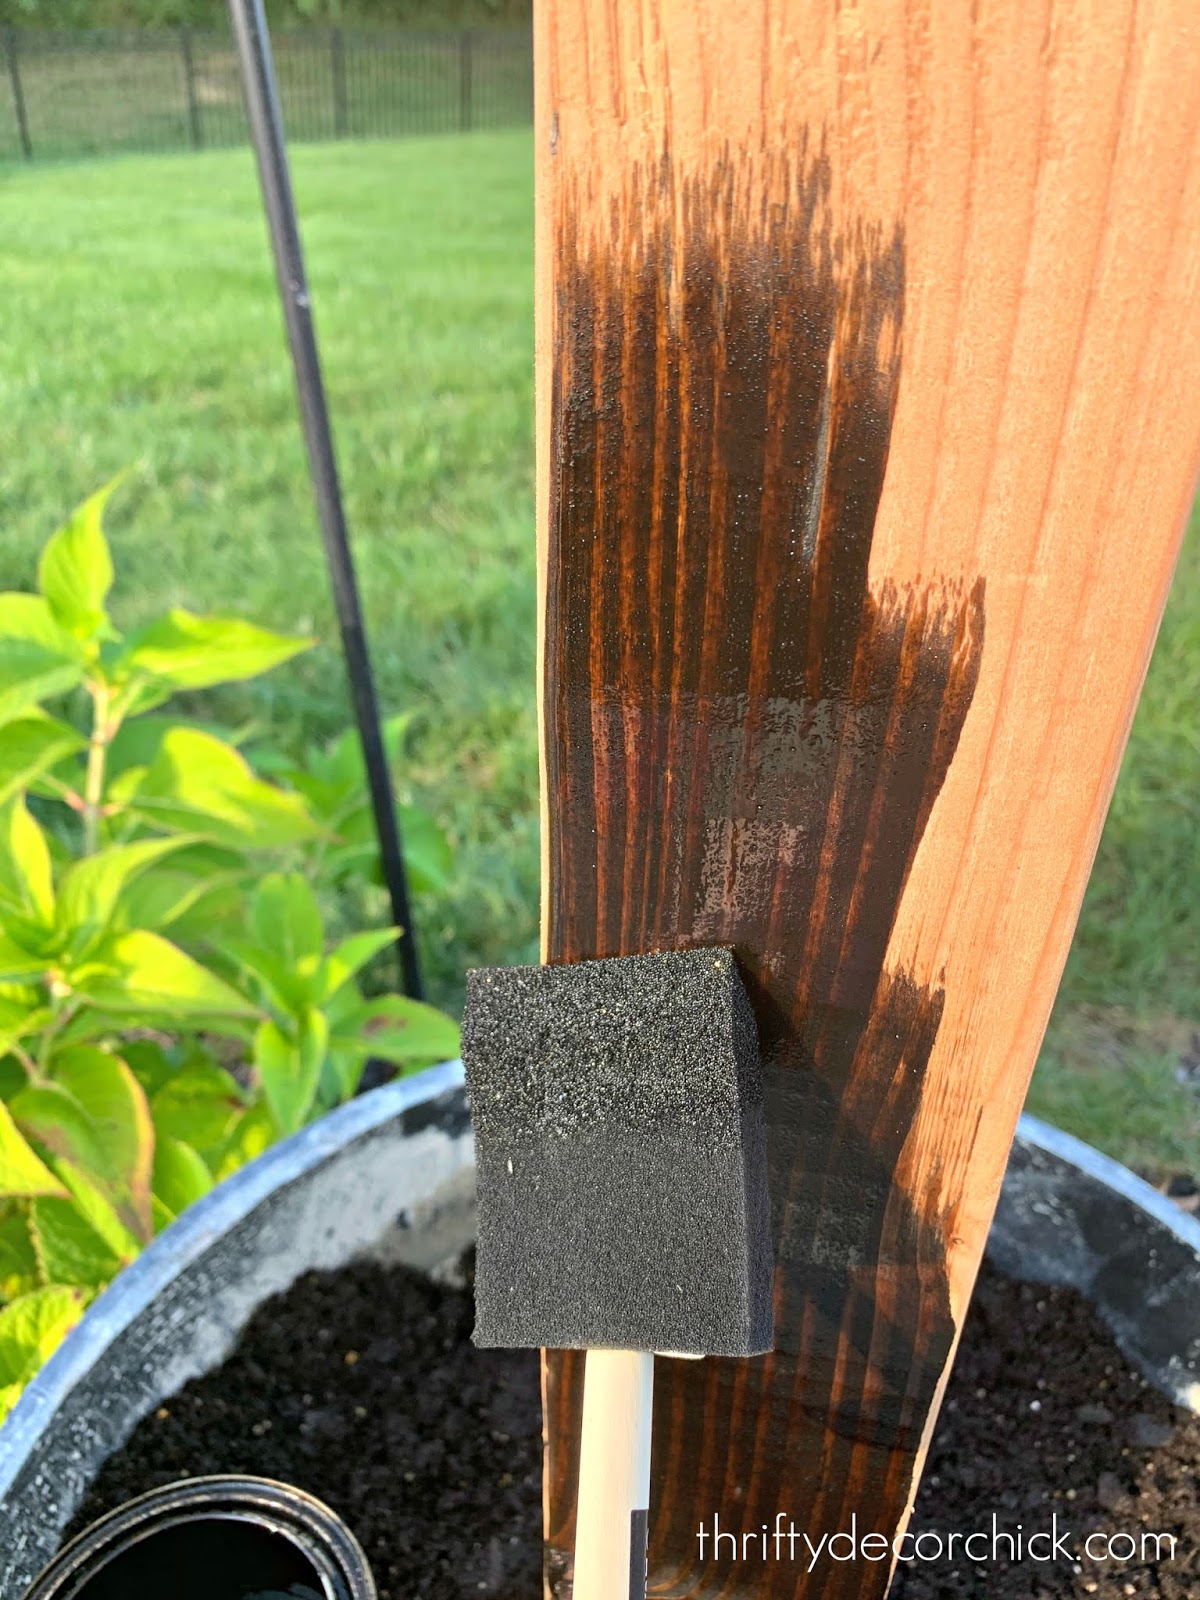
You may stain or paint the 4×4’s earlier than setting them within the cement, however I am too impatient for that. I needed to get them up! It was straightforward to get them stained after the actual fact:
Step three: Safe the planters into the bottom (if wanted).
Soooo this half went rather well and was manner simpler than we thought it might be. That’s, till we began pulling on the 4x4s a bit…and we realized there was no manner these would not tip over from the load of the lights. (Even with 100 kilos of cement!)
The lights aren’t CRAZY heavy…however we have been draping them throughout the patio, so the gap provides some rigidity. We had our handyman come out to have a look (he was serving to me hold the lights anyway) and he got here up with a superb resolution.
He discovered lengthy steel metal flats on the ironmongery store that he pounded into the bottom after which secured into the cement portion of the pots:

You will want a stone/cement drill bit to get into the set cement. You may also do that whereas the cement is drying with a daily drill bit.
He connected 4 to every planter and it labored like a allure!! Sensible. They do not budge. I am shocked the planters within the tutorials I discovered keep upright — however as I discussed, if you’re inserting them nearer collectively or utilizing light-weight mild strands, they’ll in all probability work. (Our lights are strung 20+ toes over the patio.)
As a result of I used to be filling the remaining a part of every planter with soil and crops, I drilled a number of holes into the edges of the planters so water does not pool up inside:

I discovered a flat of those succulents at Lowe’s — it was SO straightforward to plant! You may both simply lay them down over the filth or tear them into items like I did:

Hopefully they do nicely on the market! One flat was $21 and I had a lot for the 2 planters. Within the spring I will add petunias that may spill over the edges.
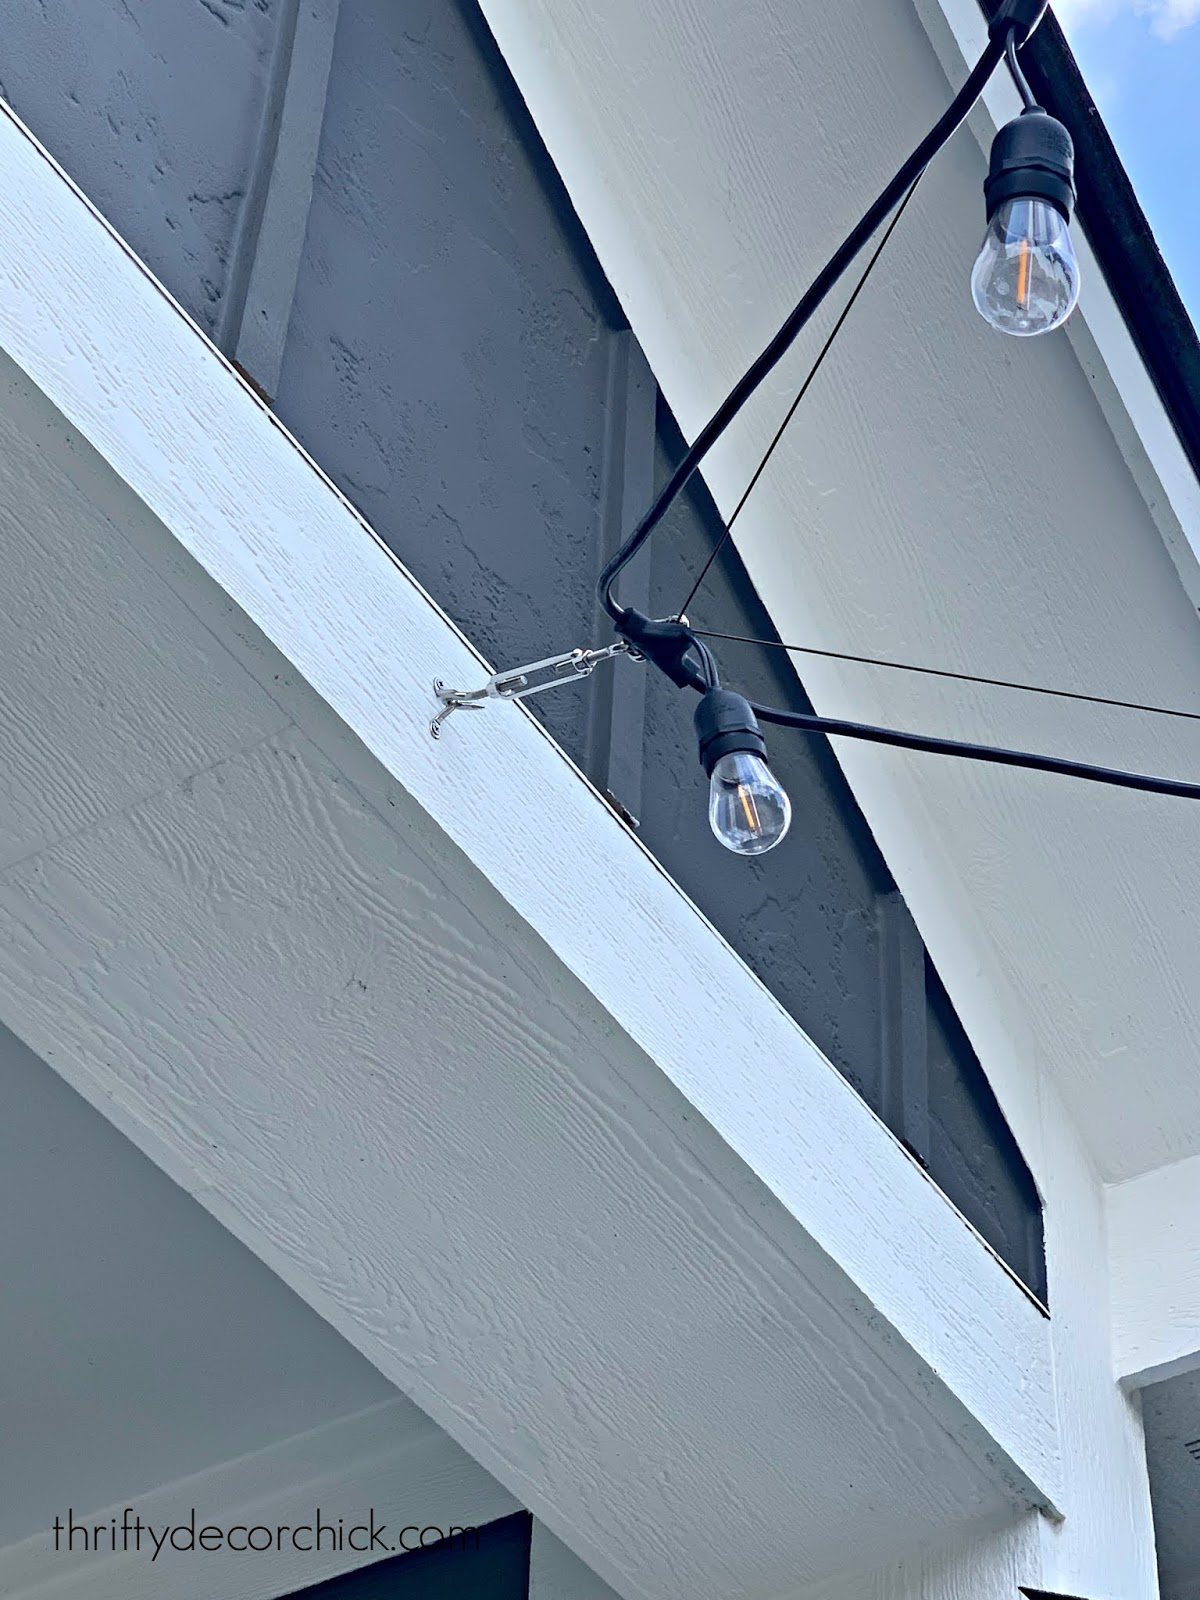
Step 4: Grasp the lights with {hardware}.

We had loads of {hardware} and wire leftover. If you’re draping the lights lower than seven toes, you possibly can simply hold them by themselves. The model recommends that you just use wire for distances longer than that.
The package comes with 150 toes of wire, which was far more than we would have liked. The outside lights we use are from Feit and are 48 toes every. So you may simply need to map out the design you need primarily based in your house and the way lengthy your lights are. I knew the place we needed to begin (the nook of the patio so we might entry a plug), and I positioned the planters (earlier than we added cement) the place we needed them to drape:

It is exhausting to find out precisely how a lot you may use, so we knew the location of the final attachment to the again of the home would rely upon how a lot of the lights have been left, if that is sensible. We thought it might attain to the nook of the home, however as a substitute we needed to transfer it in a bit. This made it so we did not have any extra lights/wire hanging down.
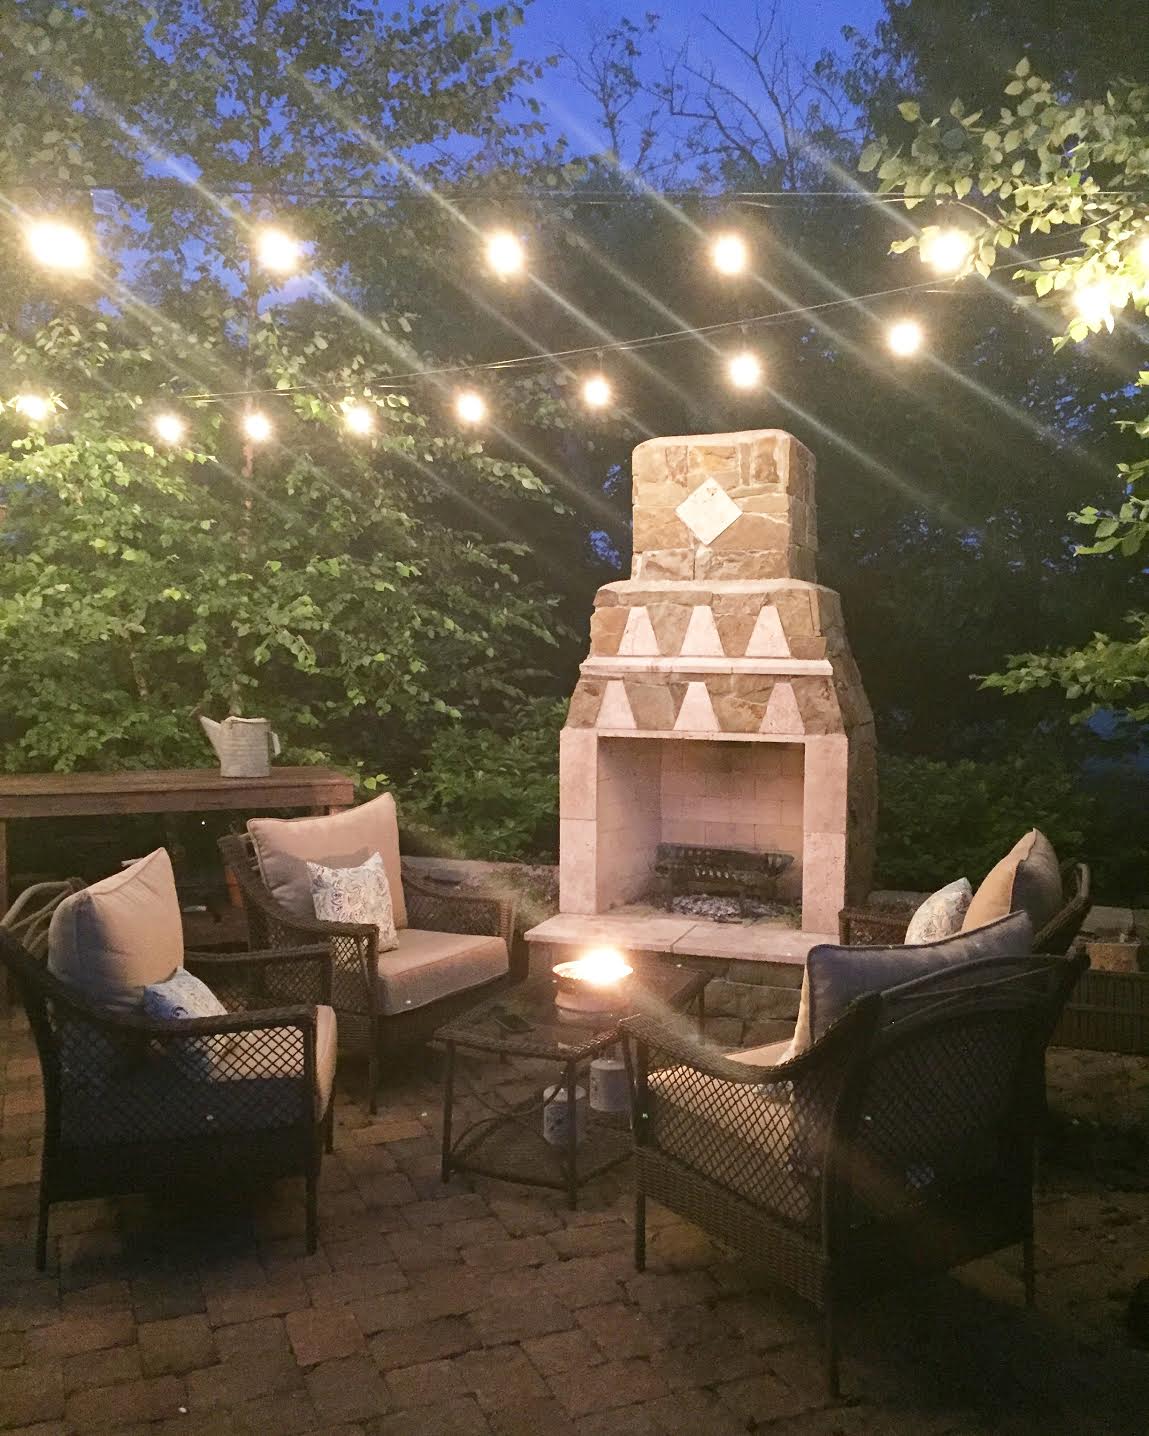
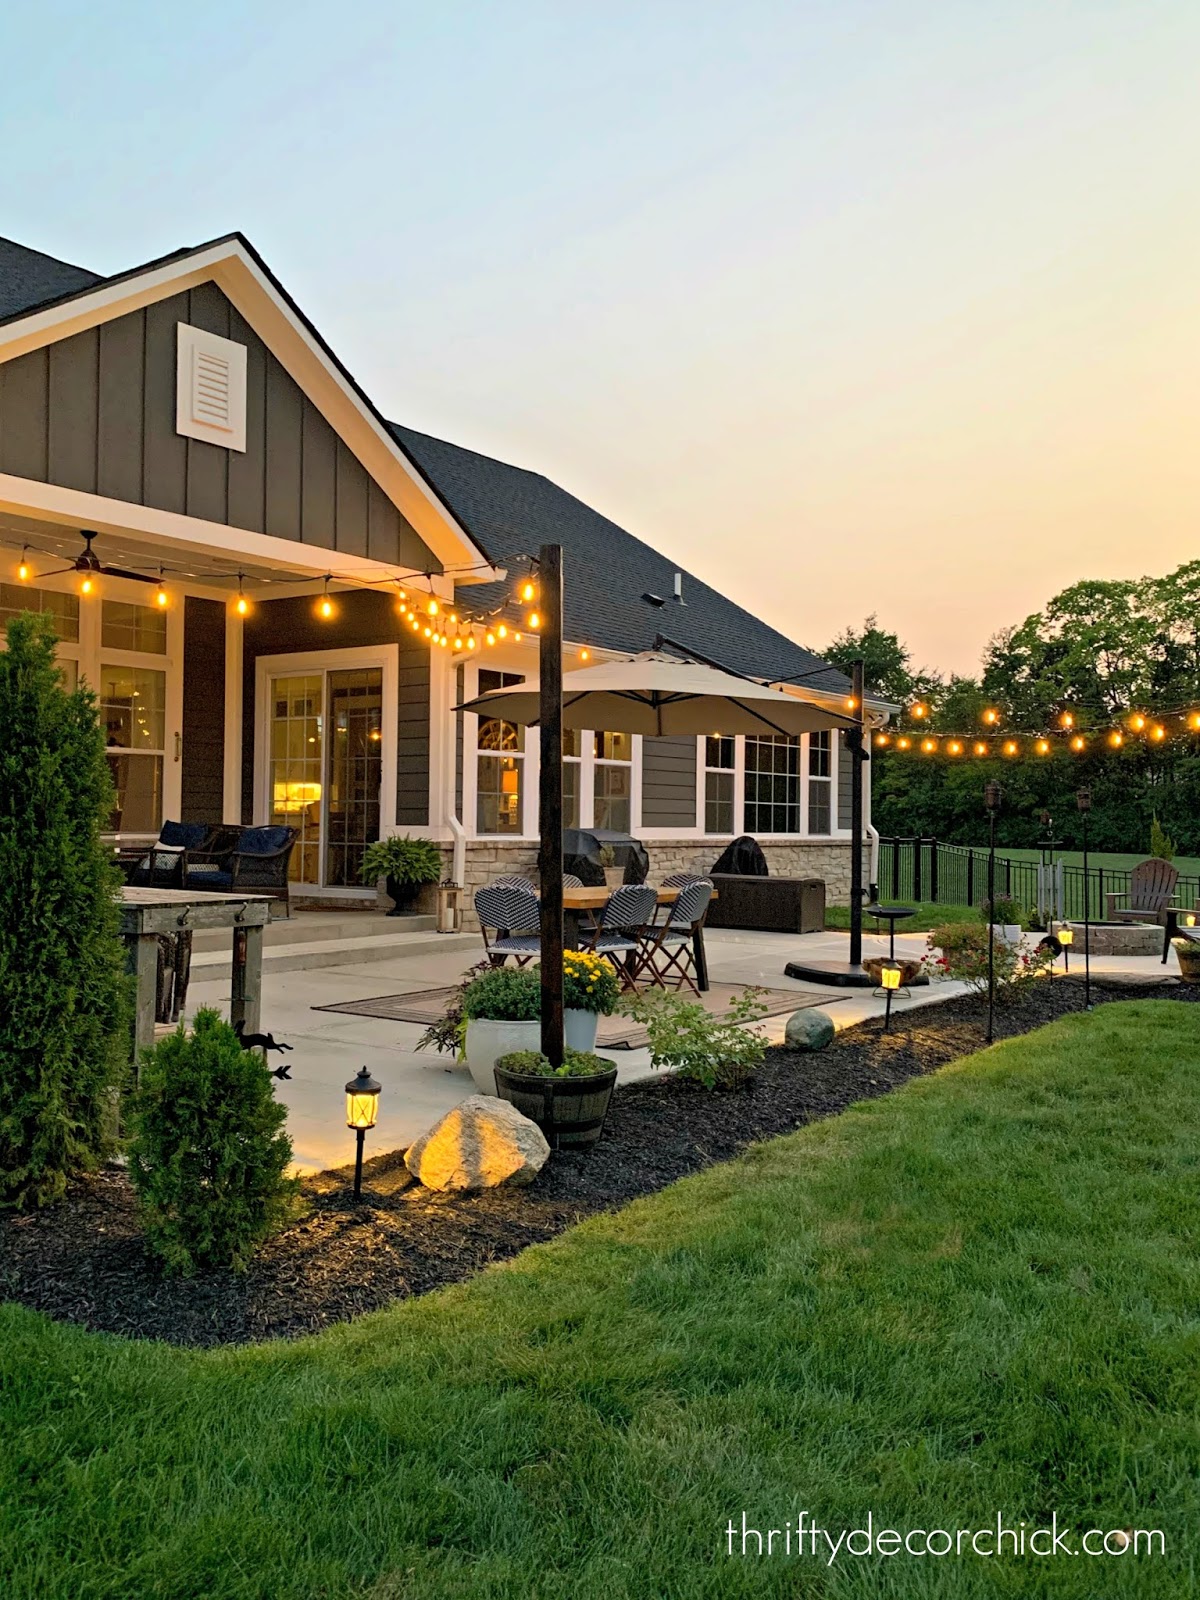
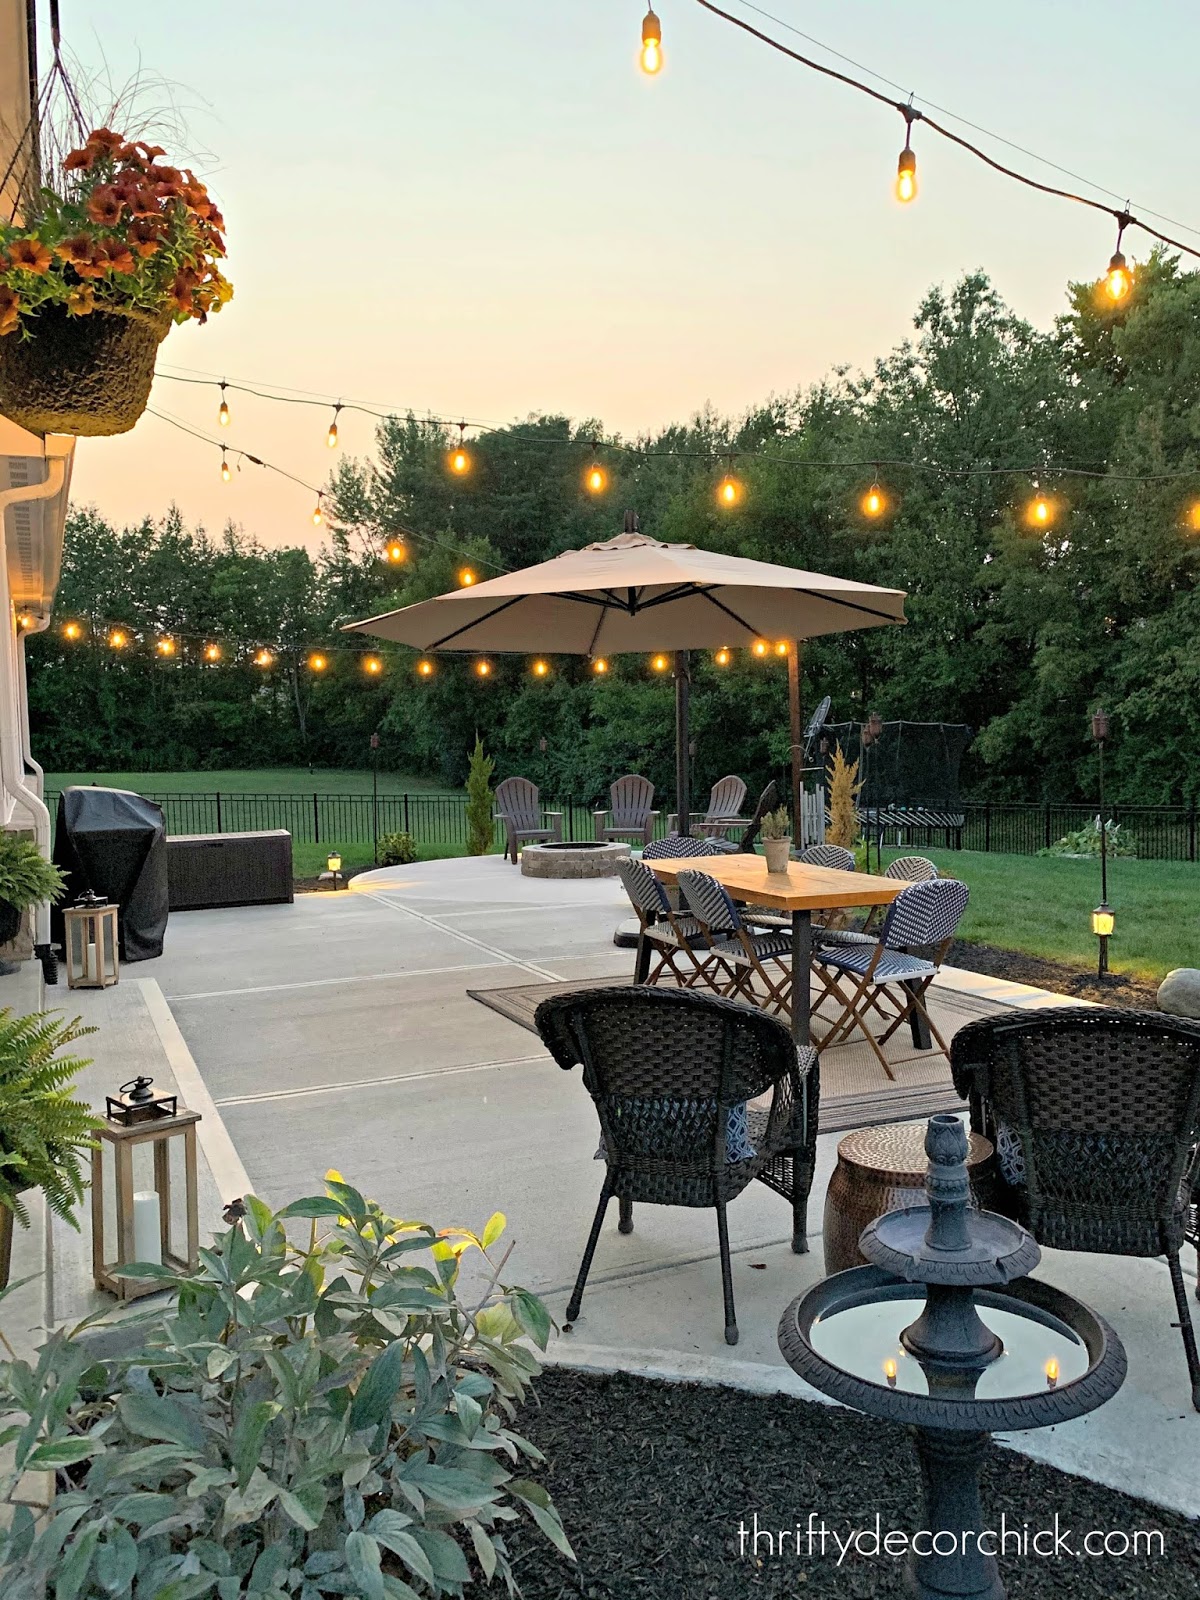
It’s SO lovely and even higher than I imagined!:
We hung the wire after which used small zip ties to connect the lights. You may string the wire via the holes within the lights beforehand, however the zip ties after was simpler. This fashion you possibly can safe the wire first after which add the lights after the actual fact.
I at all times lean to an easier look so I did not need this to get too busy. We might have added extra planters and lights and had them travel many instances…however I favor this! In order for you extra, go for it!:

The outdated units got here with a ton of additional bulbs as a result of they have been glass. These are plastic so that they solely present a number of further (additionally as a result of they’re going to final MUCH longer than the incandescent model). The LED model can be lighter (weight smart) than those we used years in the past.
I do not at all times love LED lights, particularly outdoors. I favor a hotter mild, however as you possibly can see, these aren’t stark in any respect. Very heat and welcoming:


Ensure you tighten the bulbs nicely — if they don’t seem to be working that is often the issue.
We have been going to have a swap run down the porch column so we might simply flip these on and off, however our handyman jogged my memory {that a} distant swap would work simply as nicely. We saved SO a lot cash utilizing that as a substitute of getting electrical work achieved.
That is the remote we used — simply plug it into the outlet, then plug the lights into the machine. You may flip the lights on and off from inside or outdoors simply. This is a take a look at the lights when it is fully darkish:

Do you could have fairly lights hung outdoors? They make all the pieces really feel somewhat extra magical. 🙂
Listed here are the hyperlinks and merchandise that can be useful should you try this undertaking!:
String light tutorial if you have trees
Commercial grade string lights
Plastic barrel planters (or a smaller version here)
Three foot steel flats for securing the planters
Light hanging hardware kit
Quikrete fast setting cement
Remote control outdoor plug/switch
You should use this picture to pin this undertaking for later:

